|
Here is an incomplete catalog of Marx locomotives. Initially, this section will feature only
those locomotives that were un-numbered and are, thus, hard for the uninitiated to identify.
Photos not by William McFadden are used with permission.
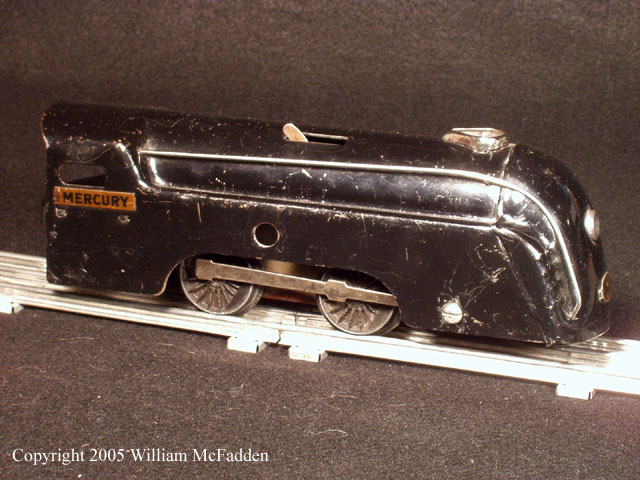
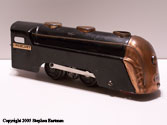
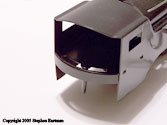
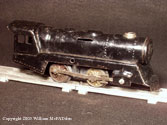
#635 MERCURY mechanical;
non-reversing, with bell
|
mechanical non-reversing
motor with bell
|
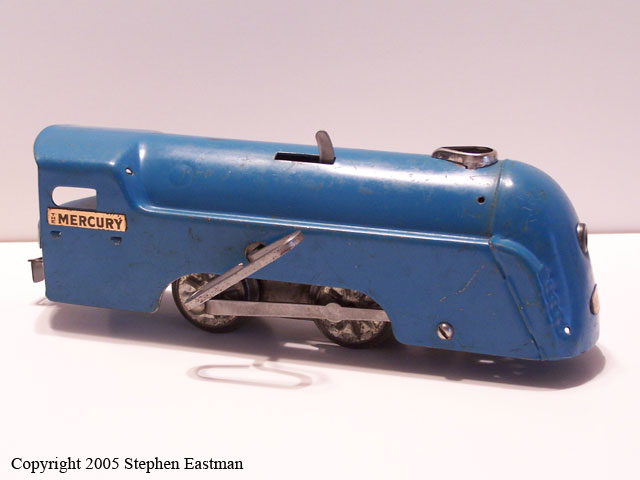
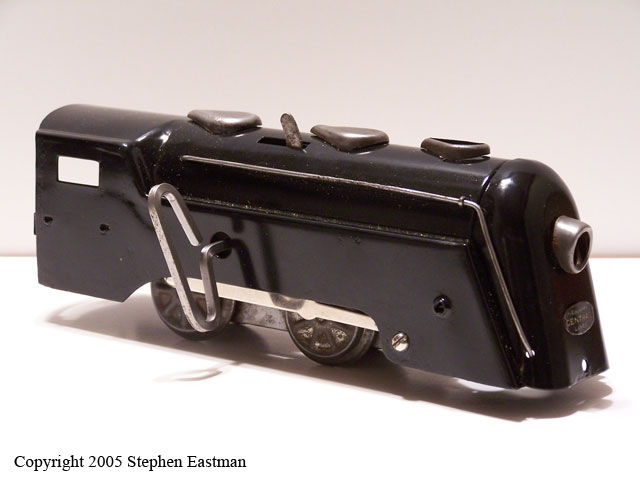
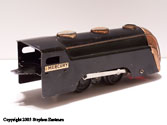
#635 MERCURY mechanical;
non-reversing with air-whistle
photo by Steve Eastman
|
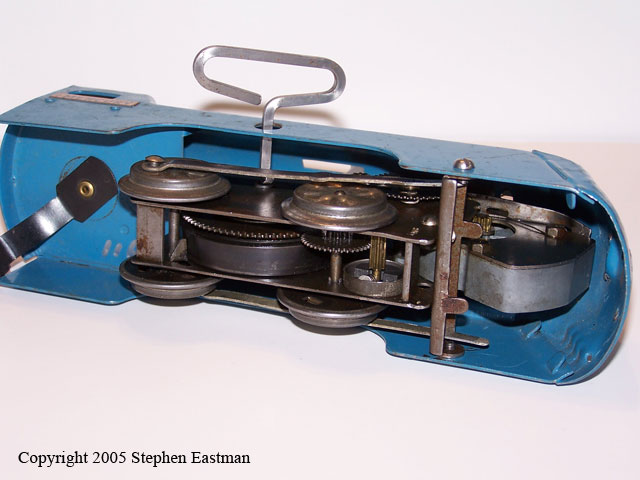
mechanical non-reversing
motor with air-whistle
photo by Steve Eastman
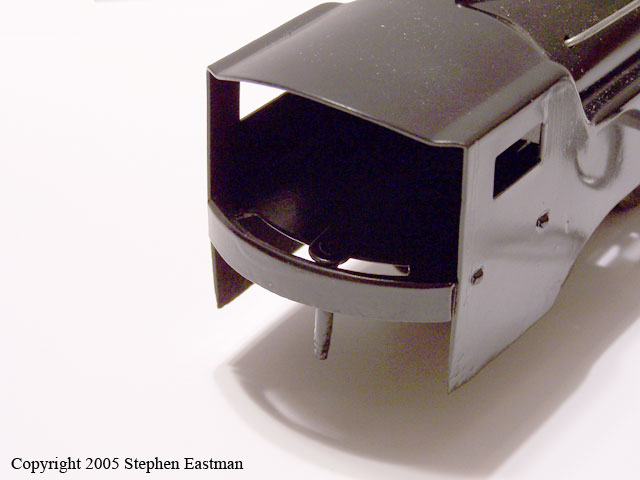
|
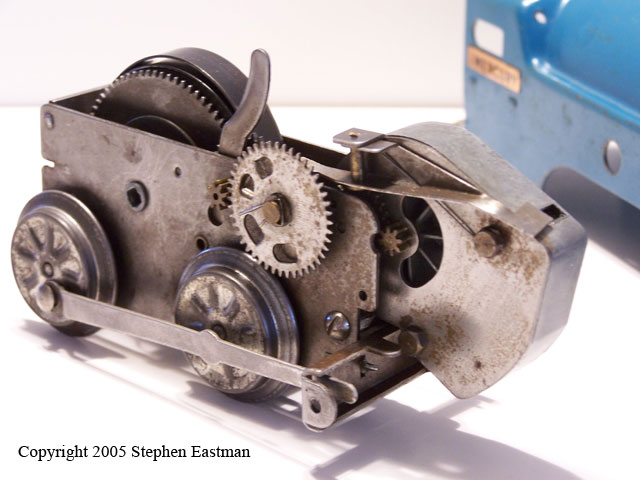
mechanical non-reversing
motor with air-whistle;
notice straight lever
photo by Steve Eastman
|
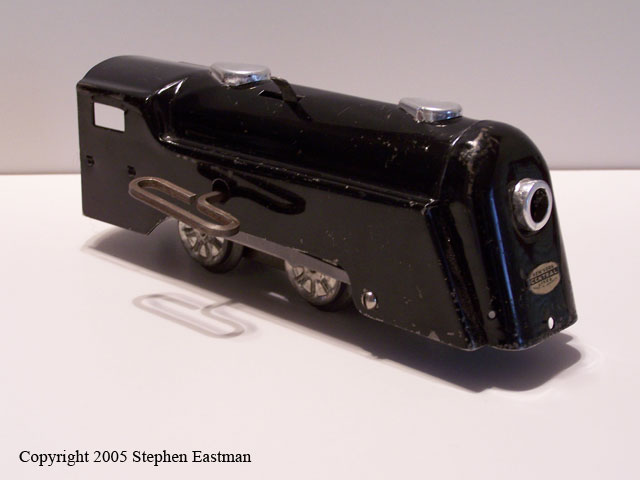
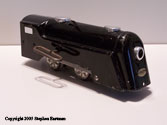
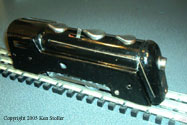
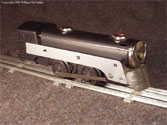
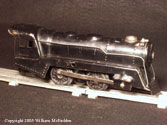
#635 MERCURY electric;
photo by Steve Eastman
|
#635 MERCURY electric;
notice the coupler for streamlined passenger train;
photo by Steve Eastman
|
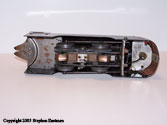
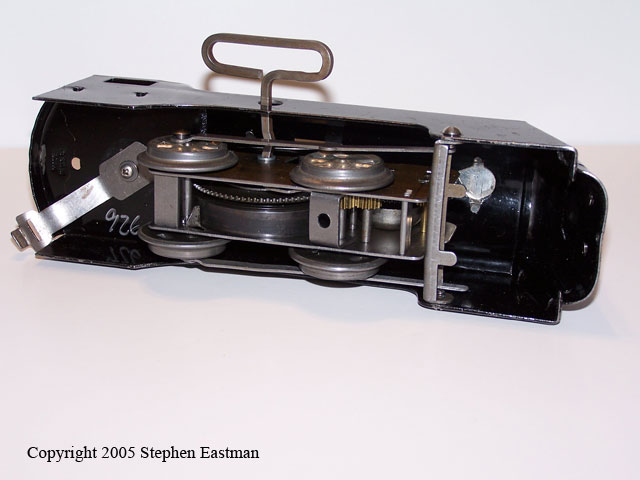
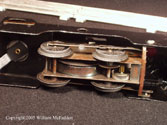
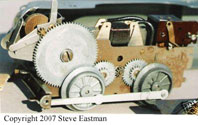
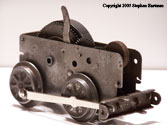
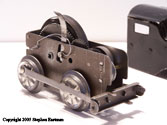
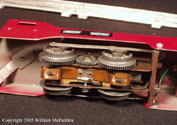
pre-war single-reduction motor
with two-piece pickup; notice size of gears on drivers;
photo by Steve Eastman
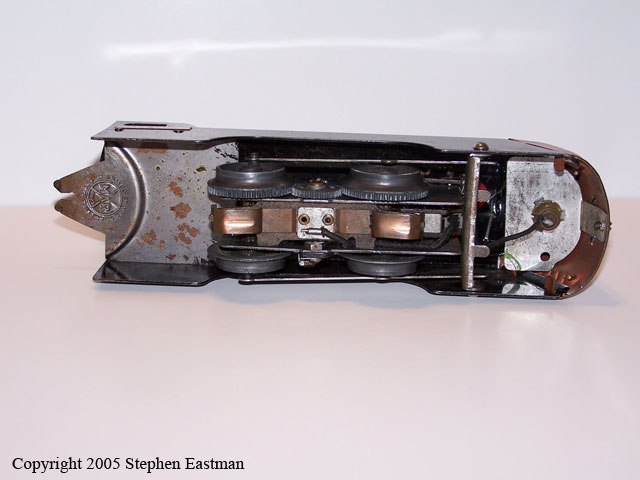
|
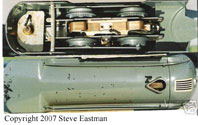
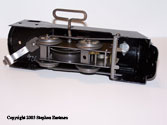
#635 MERCURY electric
with spark mechanism
photo by Steve Eastman
|
#635 MERCURY electric
with spark mechanism
photo by Steve Eastman
|
#635 MERCURY electric
with spark mechanism
photo by Steve Eastman
|
#635 MERCURY electric
with spark mechanism
photo by Steve Eastman
|
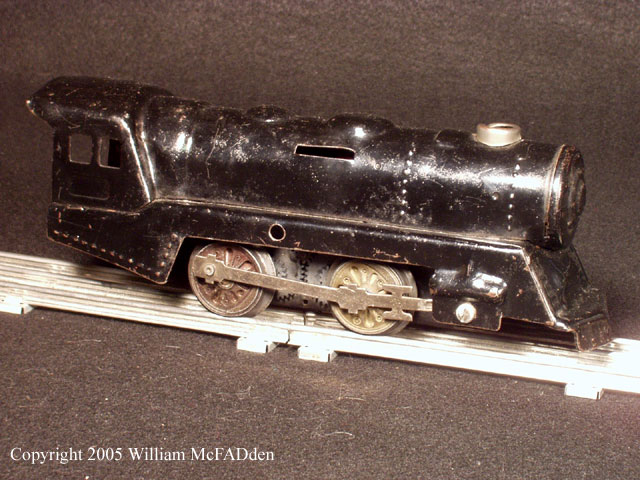
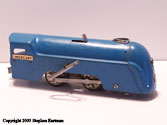
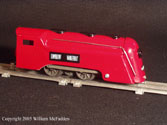
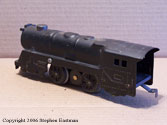
#597 COMMODORE VANDERBILT
mechanical; non-reversing;
photo by Steve Eastman
|
swinging-peg coupler;
photo by Steve Eastman
|
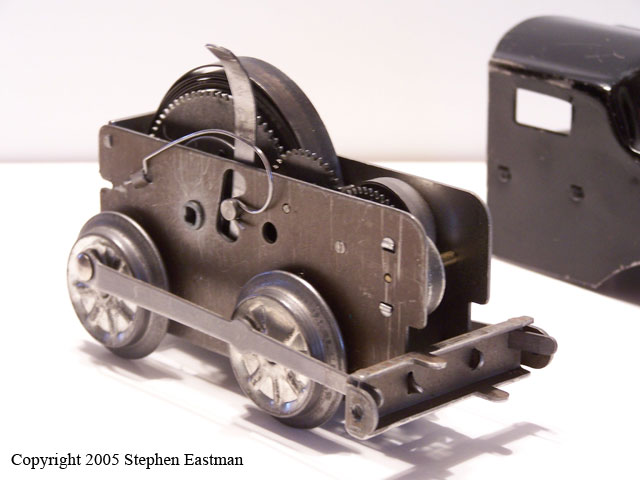
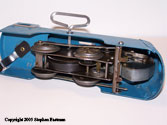
mechanical non-reversing
motor; notice straight lever;
photo by Steve Eastman
|
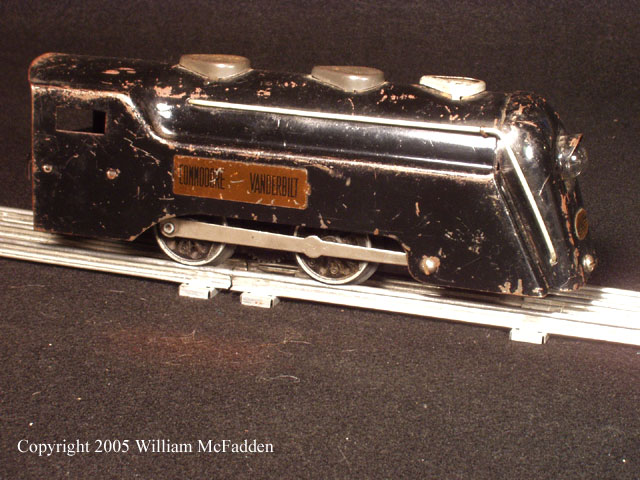
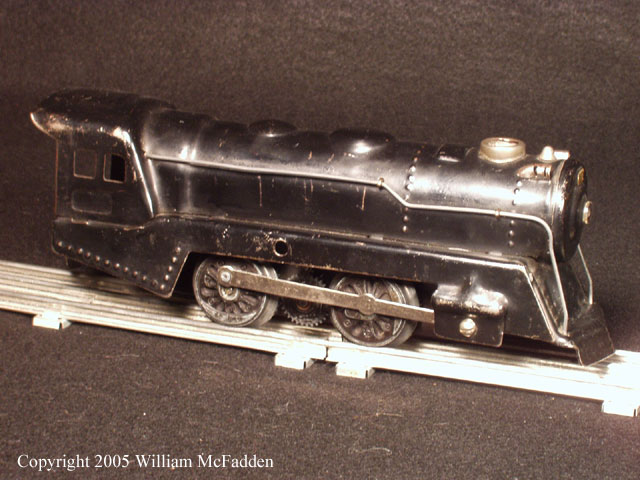
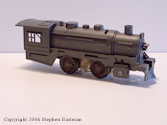
#597 COMMODORE VANDERBILT
mechanical; reversing;
photo by Steve Eastman
|
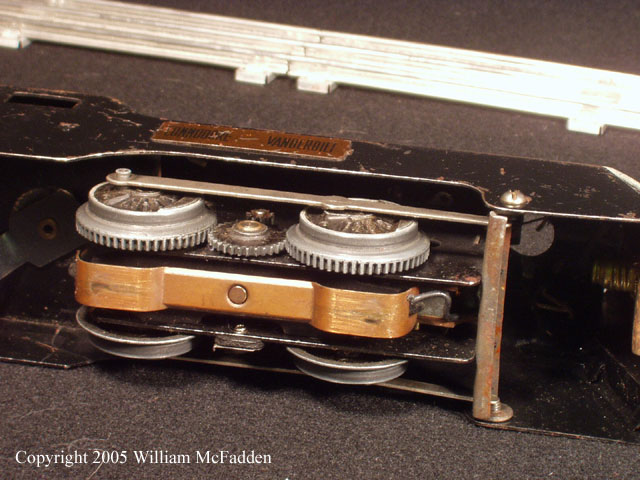
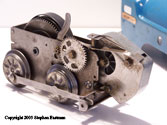
mechanical reversing motor;
photo by Steve Eastman
|
mechanical reversing
motor; notice angled lever;
photo by Steve Eastman
|
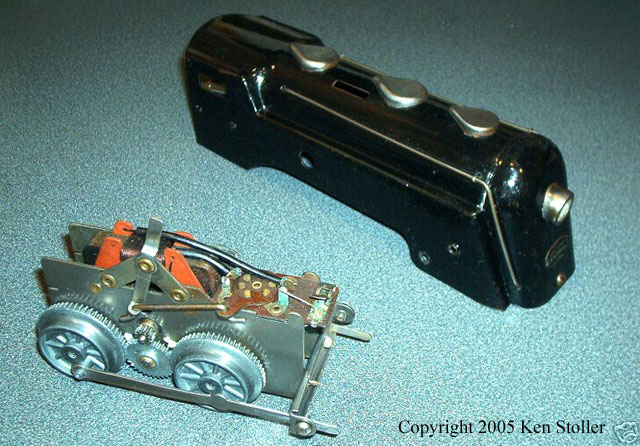
#597 COMMODORE VANDERBILT
electric with manual reverse &
swing-peg coupler;
photo by Ken Stoller
|

#597 COMMODORE VANDERBILT
electric with manual reverse &
swing-peg coupler;
photo by Ken Stoller
|

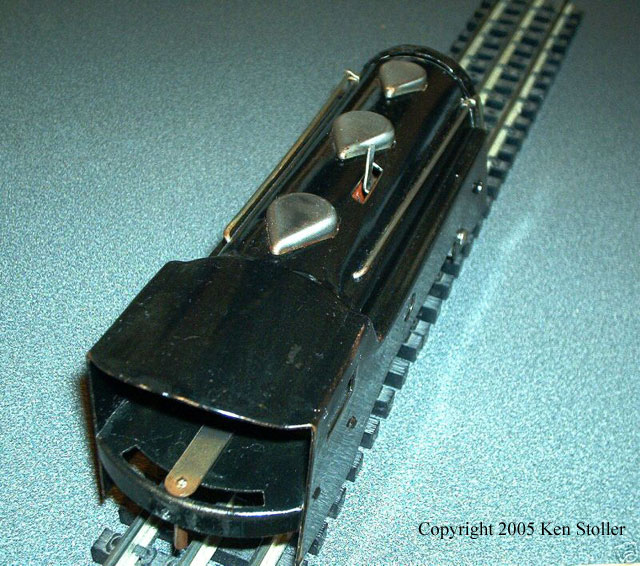
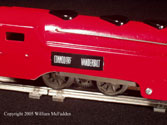
#597 COMMODORE VANDERBILT
swing-peg coupler;
photo by Ken Stoller
|
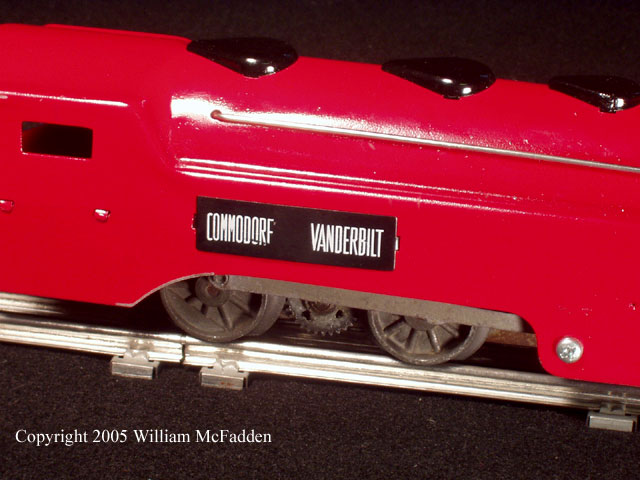
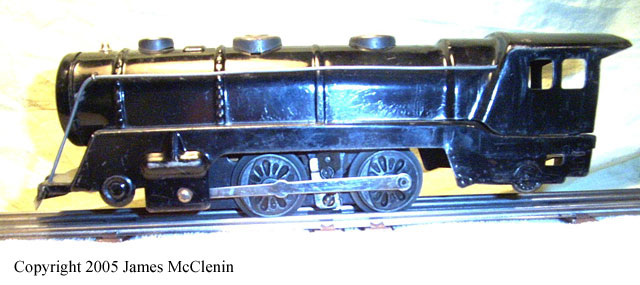
#597 COMMODORE VANDERBILT
(re-painted)
|
notice the ten-spoke drivers
|
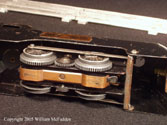
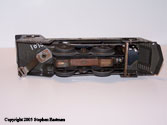
pre-war single-reduction motor
with two-piece pickup; notice
size of gears on back of drivers
|
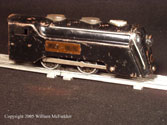
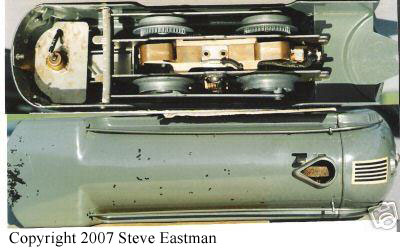
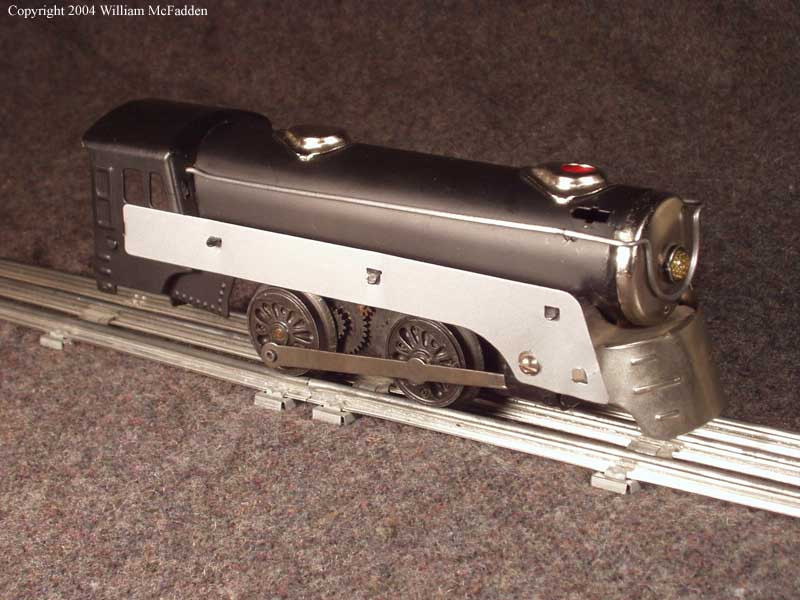
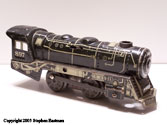
#597 COMMODORE VANDERBILT
with Baldwin drivers
|
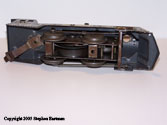
post-war single-reduction
motor with one-piece pickup
|

#994
notice length of locomotive and fake pilot and
trailing trucks; photo by James McClenin
|
#494/#495/#593/#3000/CN
Jubilee
|
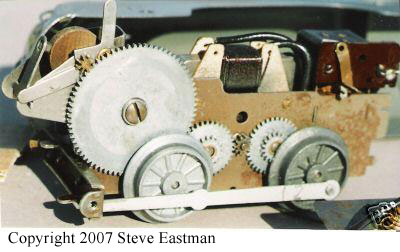
#494/#495/#593/#3000/CN
Jubilee with double-reduction
motor and Baldwin drivers;
notice gears behind drivers
are smaller than the drivers
(re-paint and non-original motor)
|
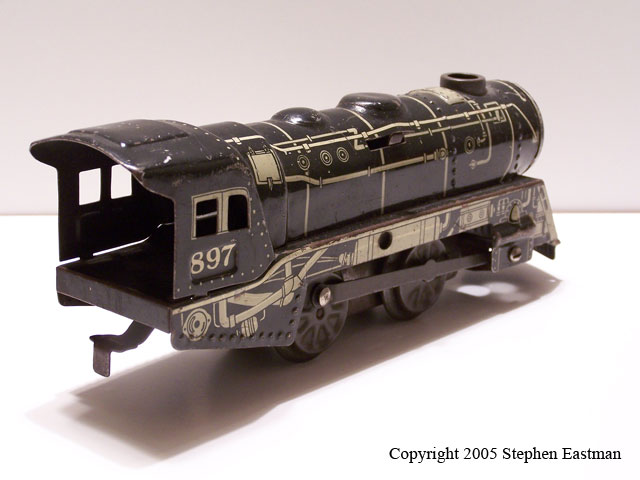
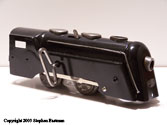
#897 mechanical, reversing
notice angled lever;
photo by Steve Eastman
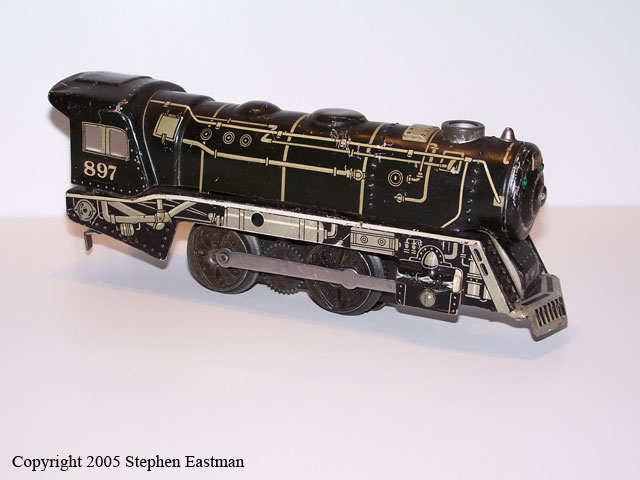
|

notice angled lever;
photo by Steve Eastman
|
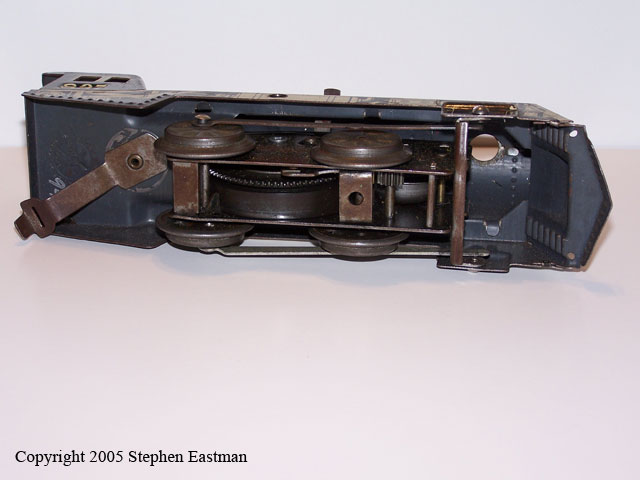
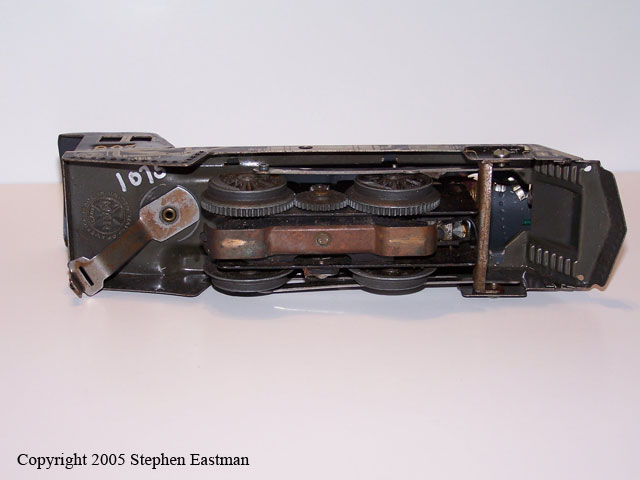
mechanical reversing motor;
photo by Steve Eastman
|

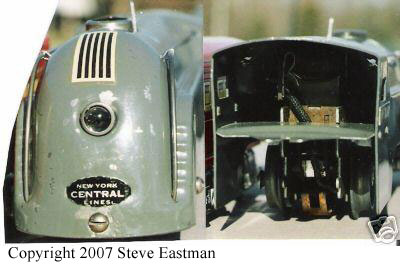
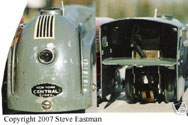
#897 electric;
single-reduction motor; all
898s have hole for wind-up key;
photo by Steve Eastman
|
single-reduction electric
motor with one-piece pick-up;
photo by Steve Eastman
|
#898 with mechanical motor
replaced with double-reduction
electric motor; notice slot for
key; all 898s have key-hole
on sideboards; some 898s
have lighted number-board
above headlight
|
#898 with with single-reduction
electric motor, Baldwin drivers,
and lighted number-board
above headlight; notice key-hole
on sideboards
|
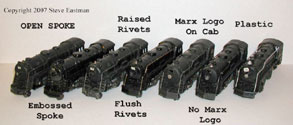
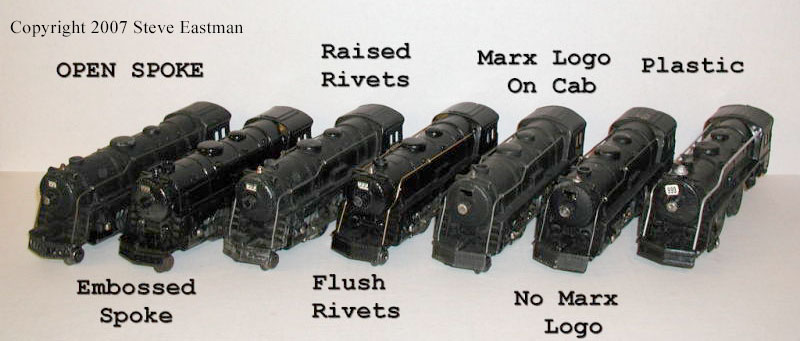
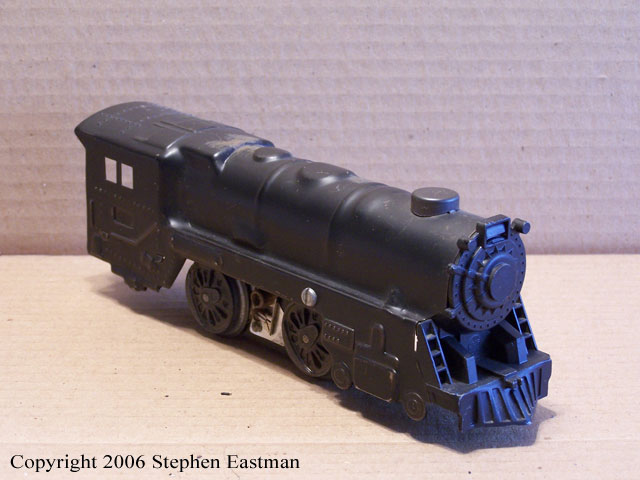
#999 variations
photo by Steve Eastman
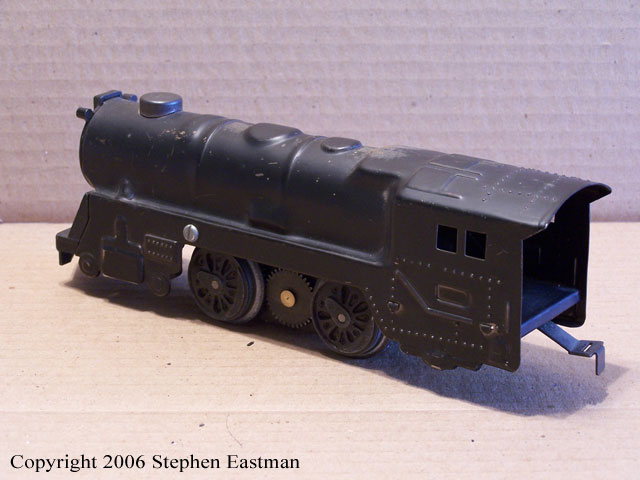
|
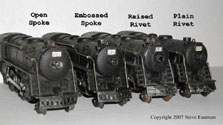
#999 variations
photo by Steve Eastman
|

#999 no logo
photo by Steve Eastman
|
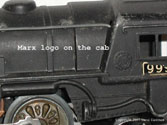
#999 logo on cab
photo by Steve Eastman
|

#999 logo on boiler
photo by Steve Eastman
|
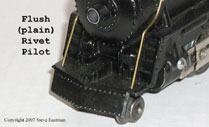
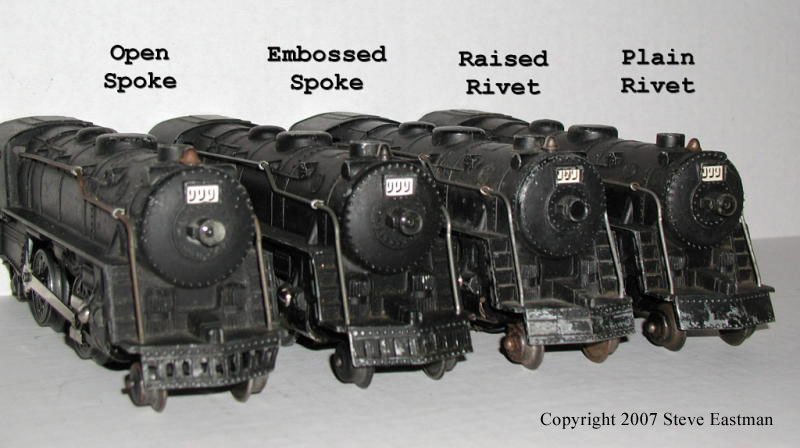
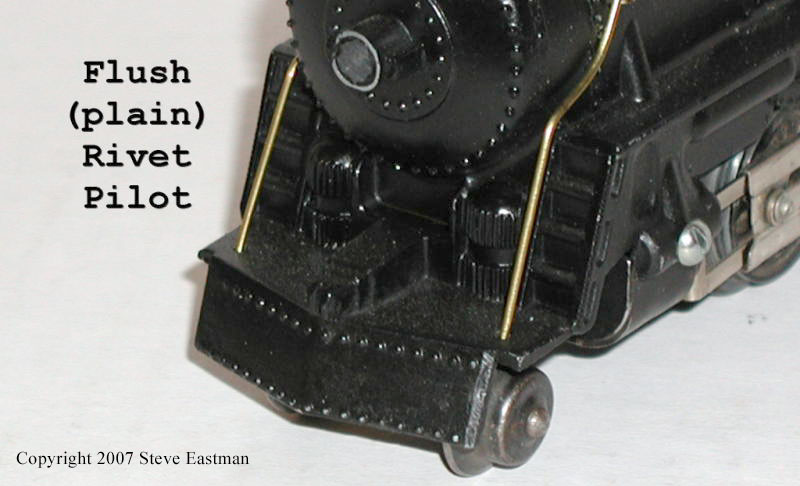
#999 plain rivet pilot
photo by Steve Eastman
|
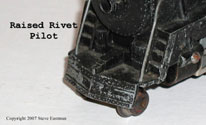
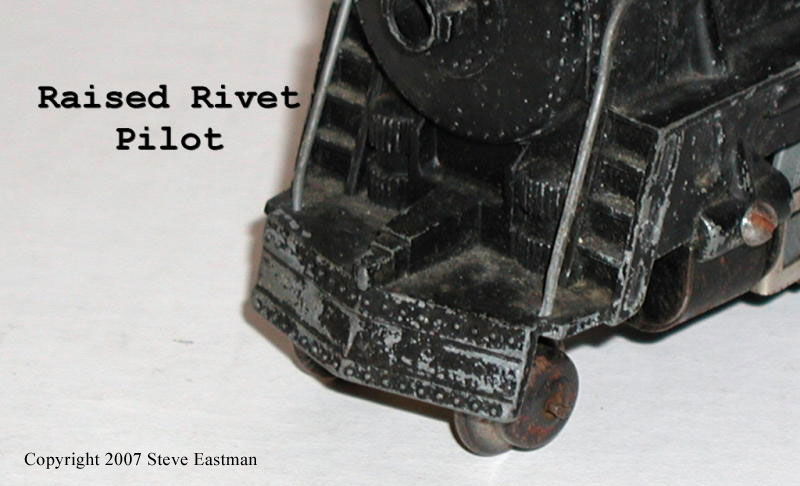
#999 raised rivet pilot
photo by Steve Eastman
|
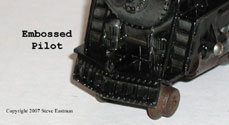
#999 embossed pilot
photo by Steve Eastman
|
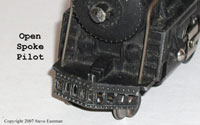
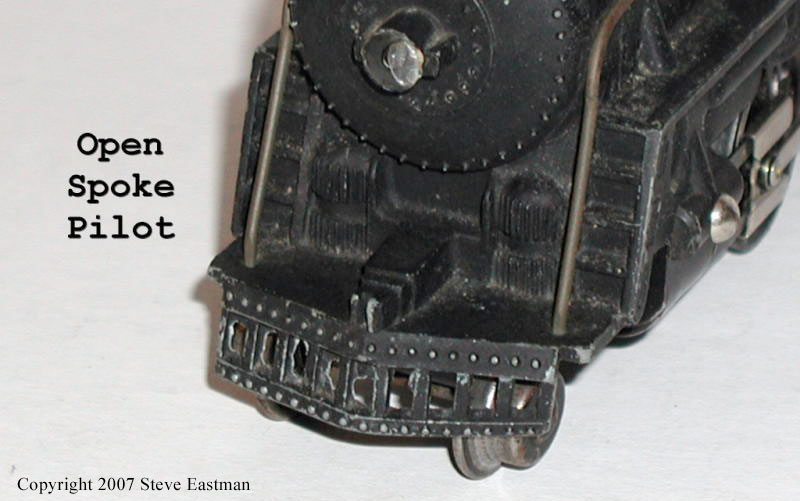
#999 open-spoke pilot
photo by Steve Eastman
|
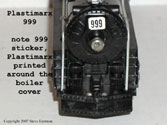
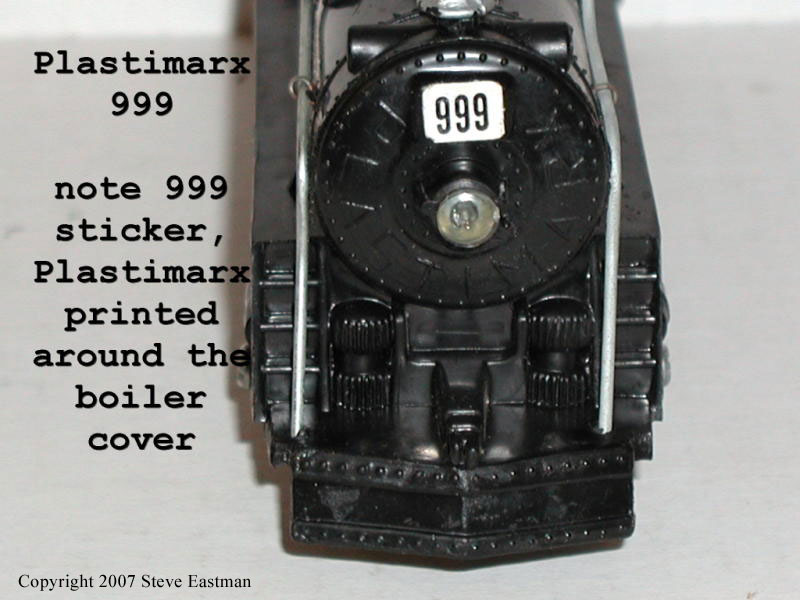
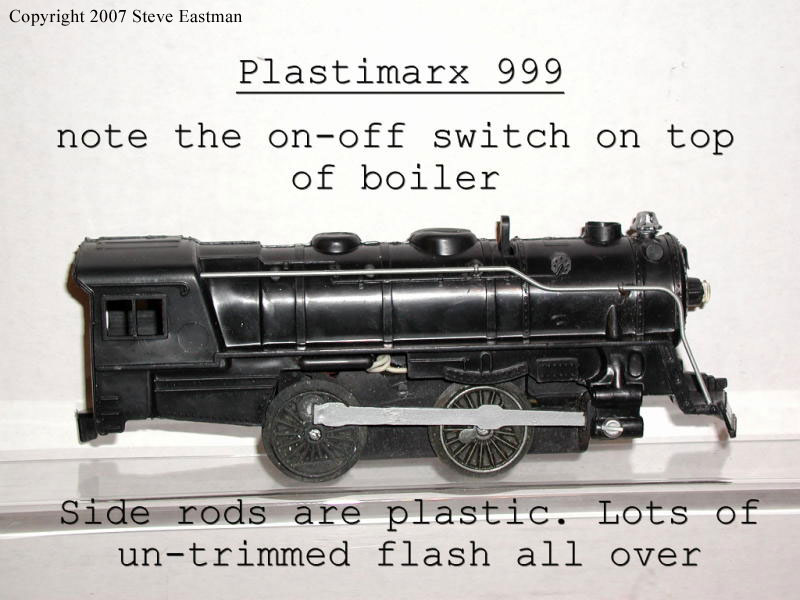
Plastimarx #999
photo by Steve Eastman
|
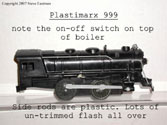
Plastimarx #999
photo by Steve Eastman
|
#591 with single-reduction
one-way electric motor
and Baldwin drivers; note the
embossed lead and trailing
trucks; this particular example
has cast-metal boiler front;
photo by Steve Eastman
|
#591 with single-reduction
one-way electric motor
and Baldwin drivers; this
example came without
side-rods;
photo by Steve Eastman
|
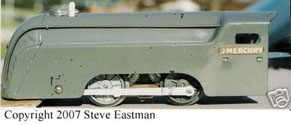
#401 battery-electric
in less-common gray
photo by Steve Eastman
|
|